There are two main ways that people compose information to be published online:
- WYSISWG: WYSIWYG (pronounced "wizzy-wig") is an acronym for what-you-see-is-what-you-get. A WYSIWYG allows to you publish in HTML wihtout knowing HTML. Instead, you move familiar content blocks around the page and ostomize them as you like. Most publishing platforms now have built-in WYSIWYGs, and they're great. But if you don't know the HTML, you can run into some problems.
- HTML Editor: You can edit HTML in any application that allows you to save in .html format, but some tools are better than others. Notepad comes with your PC, but it's a pure text editor and doesn't offer some of the bells and whistles of an editor. I use Notepad ++ becasue it's a great (free) level between Notepad and something with ALL the bells and whistles (like a Microsoft development suite).
In this lesson, you will be installing Notepad++ and taking a look at some of the features.
Let's Get Started!
We'll begin by downloading a copy of Notepad++. This is a free HTML editor that you can download here. Once you have downloaded Notepad++, go ahead and install it on your local machine. So far, so good - right?
The Two-Bit Tour
Now that Notepad++ is installed, let's take a look around. When you first launch the software, a new document will automatically be created for you. Now, copy and paste the code below into the new document.
	<html>
	<title>Hello World</title>
	<body>
	Hello World!
	</body>
	</html>
You should notice that little "-/+" signs appear along the left side of the screen at different intervals. Click them to expand and collapse the code sections. We'll talk more in Lesson 3 about why this is helpful.
Another important tool that you'll notice on the left side of the screen are the line numbers. These can be really helpful when trouble-shooting a project or when explaining where another person needs to look. For example, what's on line 6? If you answered </html>, you'd be right!
Now, let's try something else. Put your cursor next to the exclamation point in Hello World! (line 4) and type any random character. After a certain number of times, your line will automatically break and continue on the next line.
Try toggling word wrap on and off by clicking the Word Wrap button on the Notepad++ tool bar.

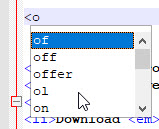
Let's explore one last bit of awesomeness before we call this a lesson. We're going to take a look at the predicitve text function. To do this, place your cursor in any blank area of the screen and type:
	<ol>
	<li>Hello World</li>
	</ol>
Don't worry that you don't understand what you were typing. The important thing you should have noticed is that when you typed "ol," you should have seen that option come up in a list. This little feature can be really helpful if you can't quite remember an HTML tag - just start typing what you think it should be and see what options you get back!
Lesson 2: Prove it
Because this lesson was just exploring some of the basic functions of the HTML editor, there is no "prove it" activity this time. See you soon for Lesson 3!
Back to the lesson plan.